5 Step By Step How To Join Cells In Excel Save Time Instantly
So, you're tired of wasting hours each day staring at a sea of separate cells in Excel, wishing there was a way to merge them into a beautiful, cohesive whole? Well, wish no more, my friend, because today we're going to tackle the age-old question: how to join cells in Excel without losing your mind. It's a task so daunting, so tedious, that it's been known to drive even the most seasoned spreadsheet warriors to the brink of madness.
The Struggle is Real
We've all been there: stuck in a never-ending cycle of copying and pasting, trying to get our data to cooperate. But fear not, dear reader, for we have the solution to this dilemma. By following these simple steps, you'll be well on your way to joining cells like a pro in no time.
Step 1: Select Your Cells
The first step in this journey is to select the cells you want to join. This may seem obvious, but trust us, it's a crucial step. Simply click and drag your cursor over the cells you want to merge, and you'll be ready to move on to the next step.
Must Read
- What Happens At The End Of Supergirl? A Clear Breakdown Of The Finale
- How Supergirl Sets Up The Dcu Future Without A Post-credits Scene
- Supergirl’s Final Moments Explained: Krem, Krypto, And Kara’s Turning Point
- Supergirl Ending Explained: Kara’s Grief, Ruthye’s Choice, And The Future Of The Dcu
- What Supergirl’s Ending Means For Lobo, Superman, And The Next Dc Films
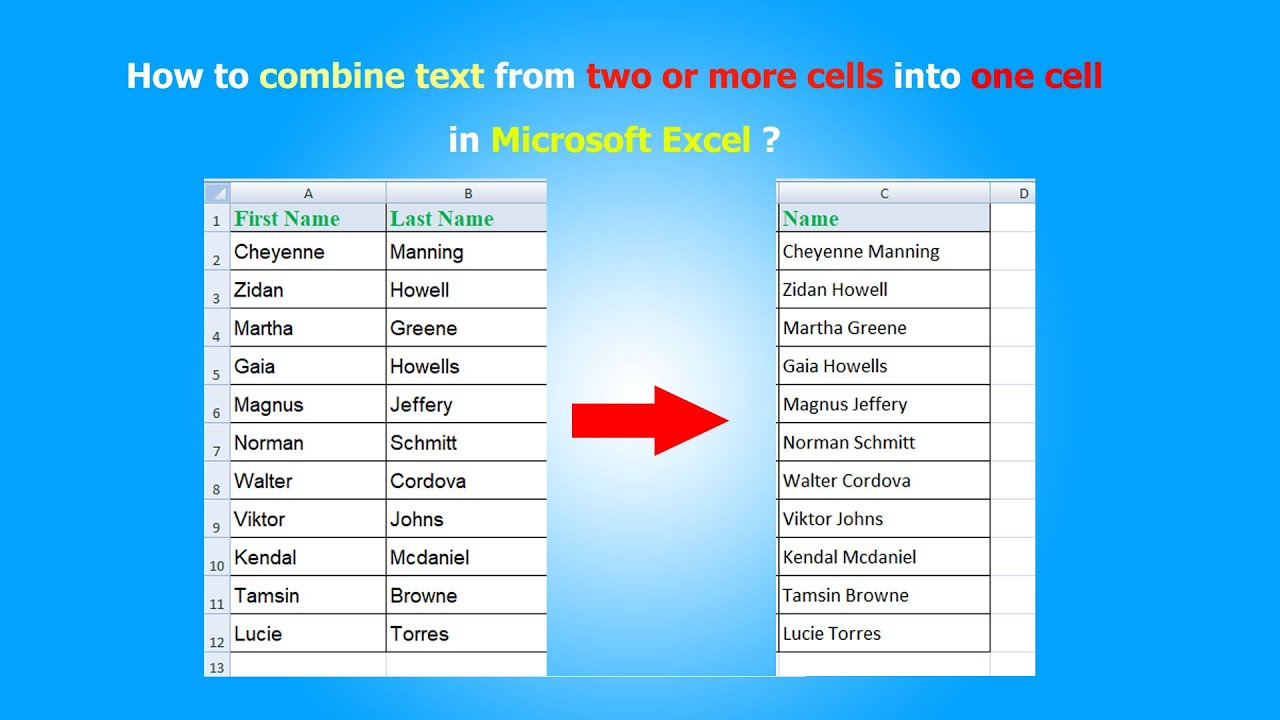
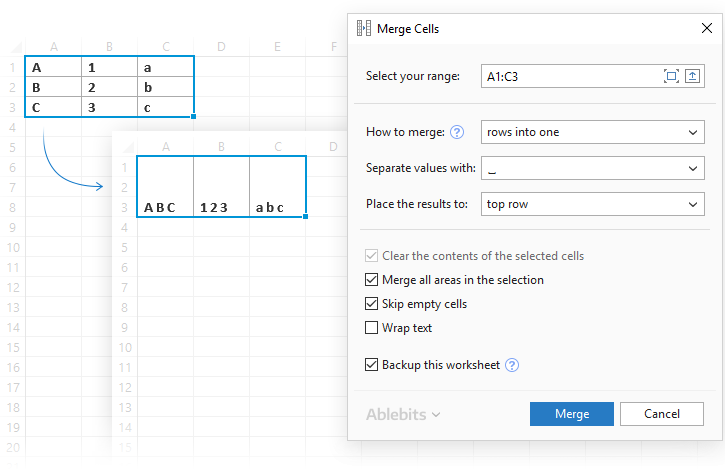
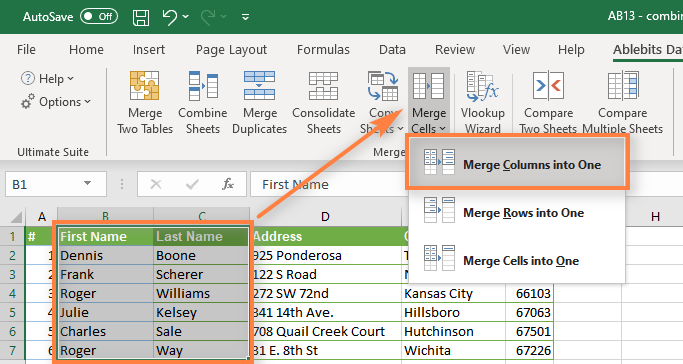
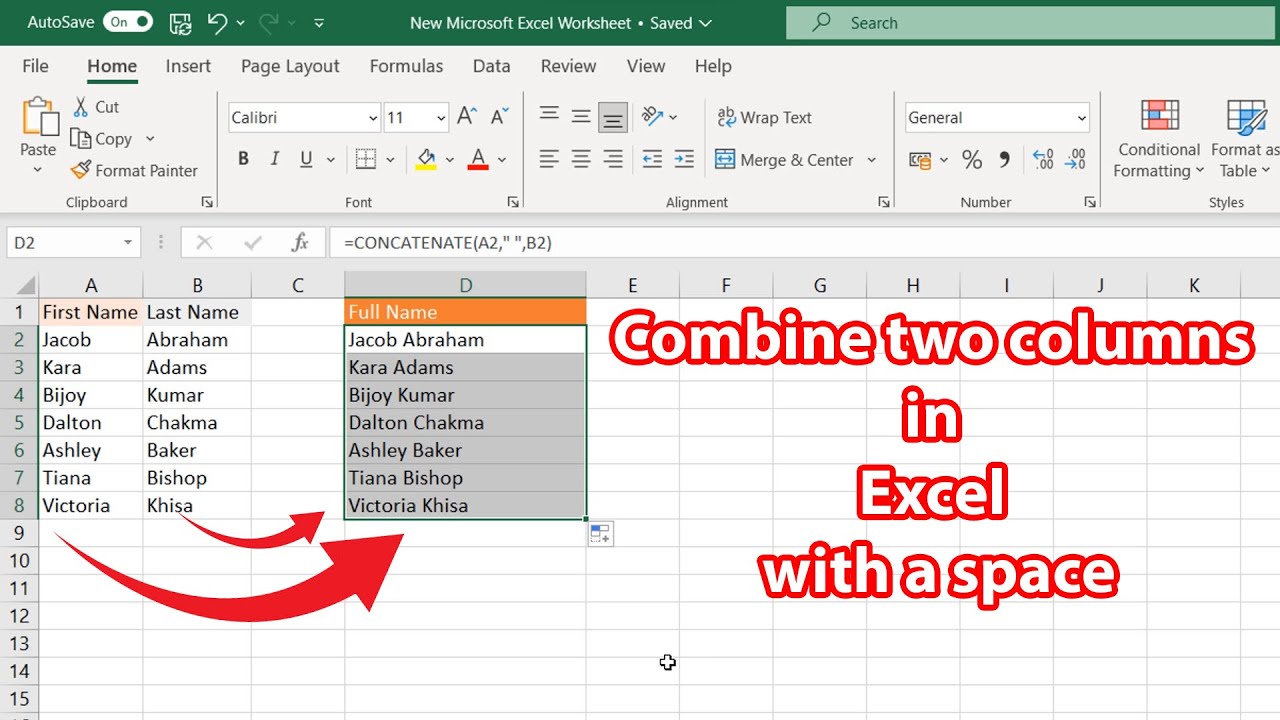
Now that you've got your cells selected, it's time to think about how you want to join them. Do you want to merge them into a single cell, or keep them separate but still linked? The choice is yours, and it's all part of the exciting world of Excel.
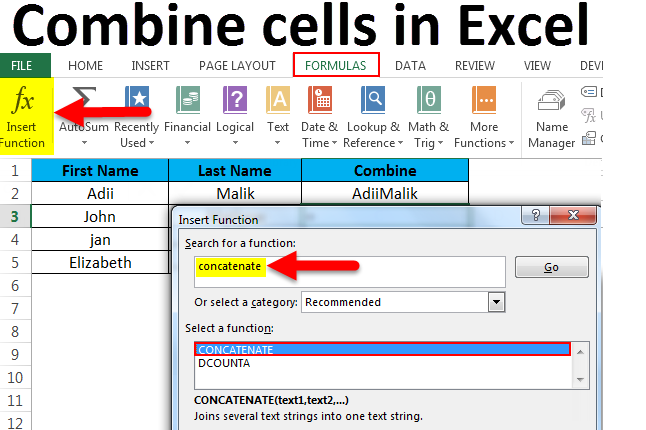
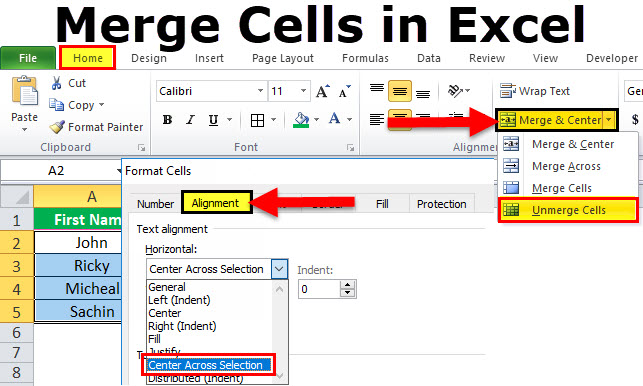
Step 2: Go to the "Home" Tab
Next, you'll need to navigate to the "Home" tab in Excel. This is where the magic happens, folks. Here, you'll find all sorts of useful tools and functions, including the one we're looking for: "Merge & Center".
But be warned: this button can be a double-edged sword. On the one hand, it can save you hours of time and frustration. On the other hand, it can also lead to formatting disasters if not used carefully. Proceed with caution, dear reader.
Step 3: Click "Merge & Center"
Now it's time to take the plunge and click that "Merge & Center" button. This will merge your selected cells into a single cell, complete with centered text and a sense of satisfaction. But don't get too comfortable – we've still got a few more steps to go.

Step 4: Verify Your Results
After merging your cells, it's a good idea to double-check your work. Make sure everything looks correct and that you haven't accidentally merged any cells you didn't mean to. This is also a good time to make any necessary adjustments to your formatting.
Step 5: Repeat as Necessary
Finally, if you need to join multiple groups of cells, simply repeat the process as many times as necessary. And congratulations – you've just saved yourself a ton of time and hassle. You can now bask in the glory of your newly merged cells, knowing that you've mastered one of the most essential skills in all of Excel.
In conclusion, joining cells in Excel is a breeze when you know the right steps to follow. So next time you're faced with a sprawling spreadsheet, don't panic – just remember these simple steps and you'll be joining cells like a pro in no time. Happy spreadsheeting, everyone.