How Do I Unhide Rows In Excel

Learning about Excel can be a fun and rewarding experience, especially when it comes to discovering hidden features like unhiding rows. In our daily lives, we often come across situations where we need to manage and organize large amounts of data, and Excel is an excellent tool for doing just that.
The ability to unhide rows in Excel is particularly useful for students, teachers, and families who need to work with spreadsheets for various purposes, such as tracking grades, budgets, or schedules. By unhiding rows, you can reveal hidden information, correct errors, or update data that was previously concealed.
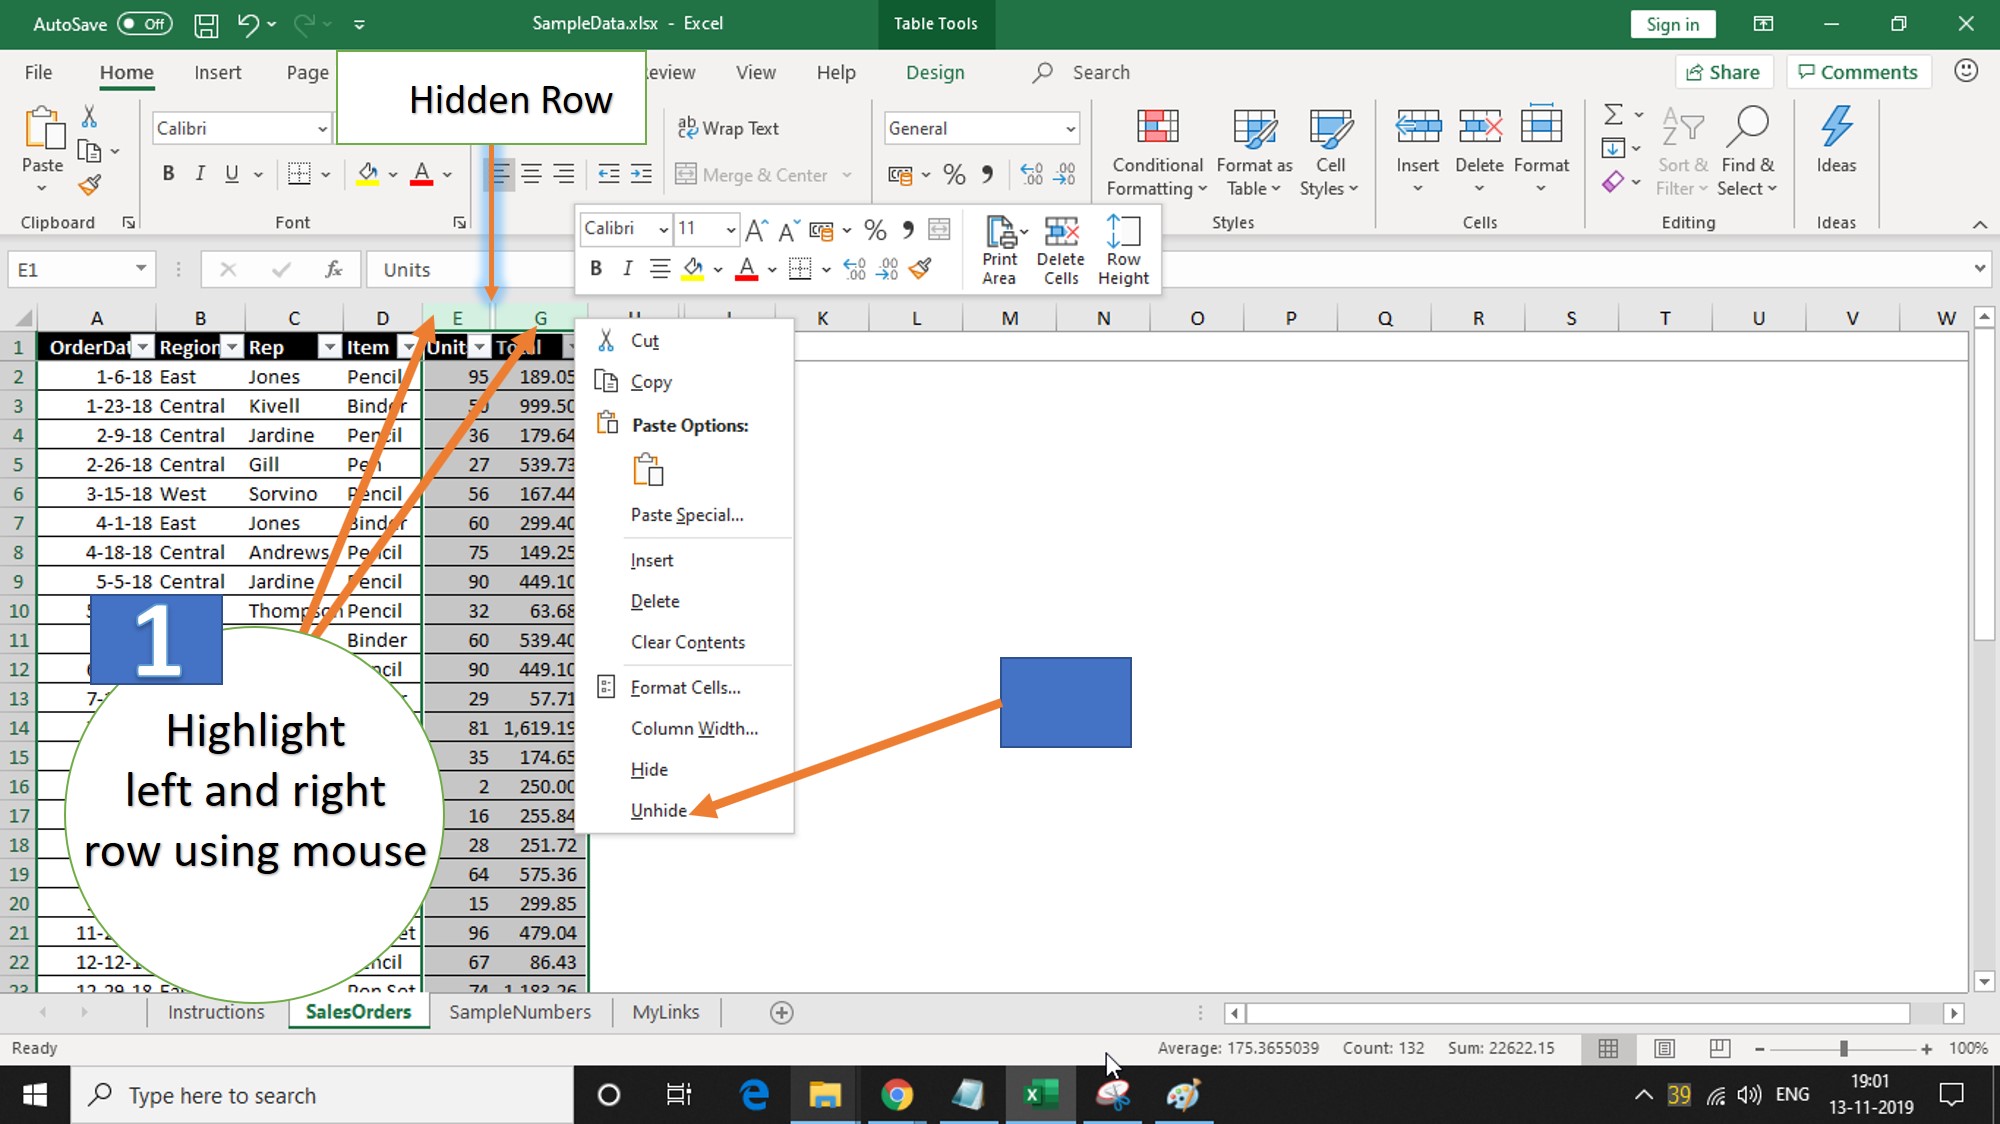
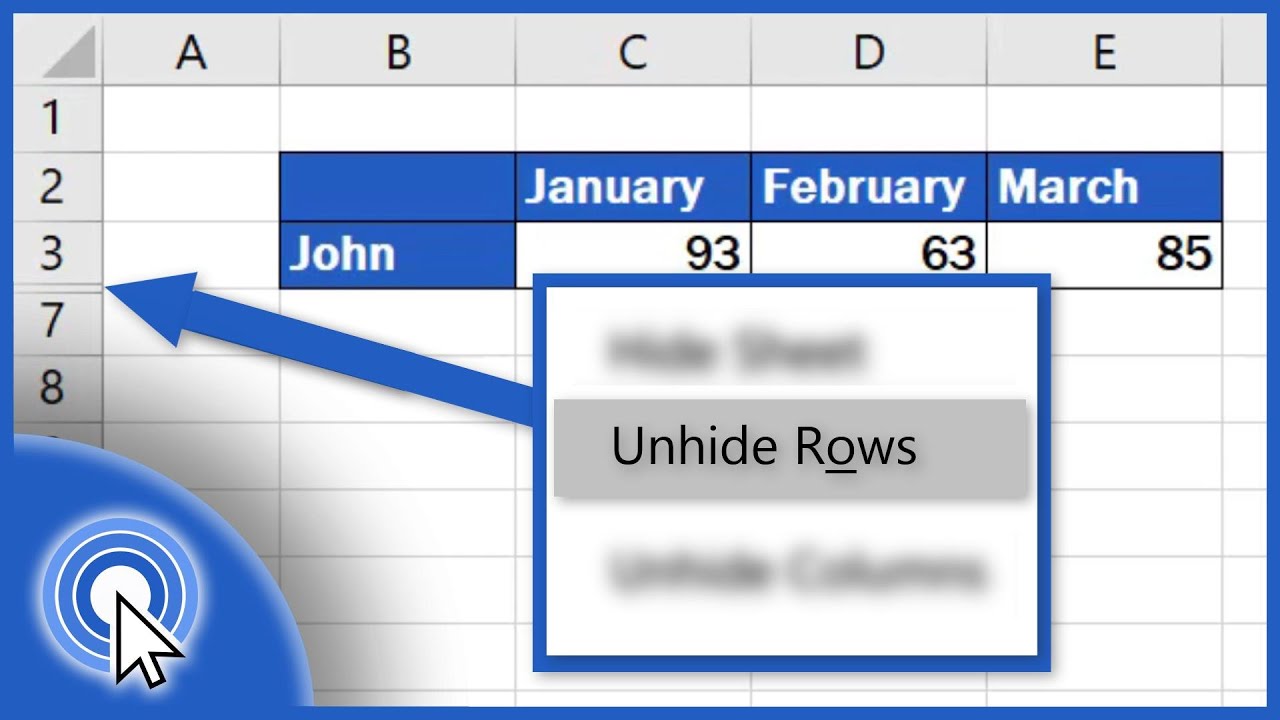
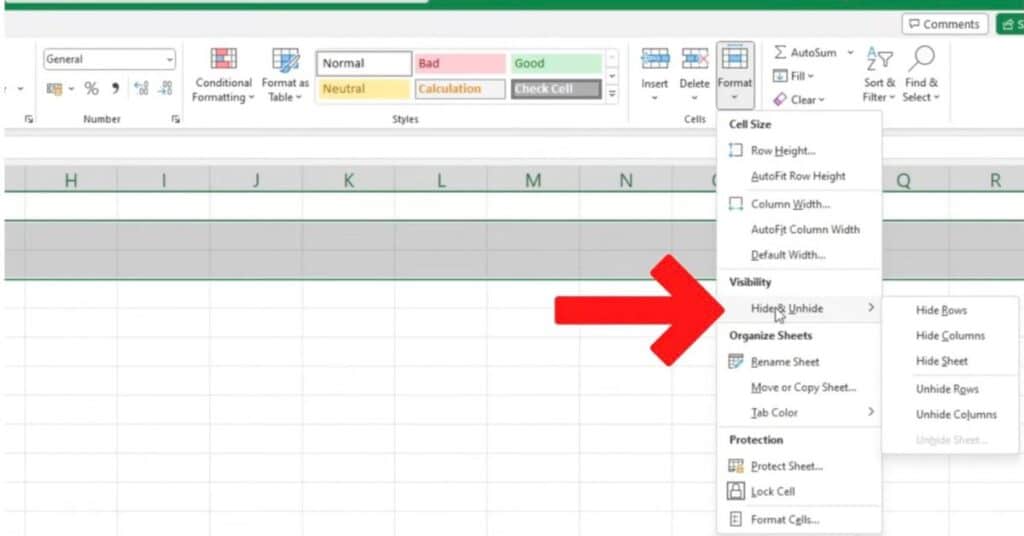
For example, a teacher might use this feature to unhide rows containing student information that was temporarily hidden for privacy reasons. Similarly, a family might use it to unhide rows in a budget spreadsheet to track expenses or income. To get started, simply select the rows above and below the hidden row, go to the Home tab, and click on Format > Hide & Unhide > Unhide Rows.
Must Read
- What Happens At The End Of Supergirl? A Clear Breakdown Of The Finale
- How Supergirl Sets Up The Dcu Future Without A Post-credits Scene
- Supergirl’s Final Moments Explained: Krem, Krypto, And Kara’s Turning Point
- Supergirl Ending Explained: Kara’s Grief, Ruthye’s Choice, And The Future Of The Dcu
- What Supergirl’s Ending Means For Lobo, Superman, And The Next Dc Films
Some practical tips for exploring this feature include practicing with sample spreadsheets, watching online tutorials, or asking a friend or colleague for guidance. By mastering the art of unhiding rows in Excel, you'll become more confident and efficient in your data management tasks, and who knows, you might just discover a new hobby or skill to enjoy.


:max_bytes(150000):strip_icc()/HideUnHideMenu-5be8cd0e46e0fb0051e9e99d.jpg)