How To Check If Secure Boot Is Enabled

With the increasing concern about cybersecurity, many of us are looking for ways to protect our devices from malware and other threats. One way to do this is by enabling Secure Boot on our computers. But, have you ever wondered how to check if Secure Boot is enabled on your device? It's actually quite simple and can be a fun learning experience, especially for tech enthusiasts and hobbyists.
The purpose of Secure Boot is to ensure that only authorized software can run on your device, preventing malicious code from loading during the boot process. This is especially useful for beginners who may not be familiar with the risks of cyber threats. For families, enabling Secure Boot can provide an extra layer of protection for their devices, giving them peace of mind when browsing the internet or downloading files.
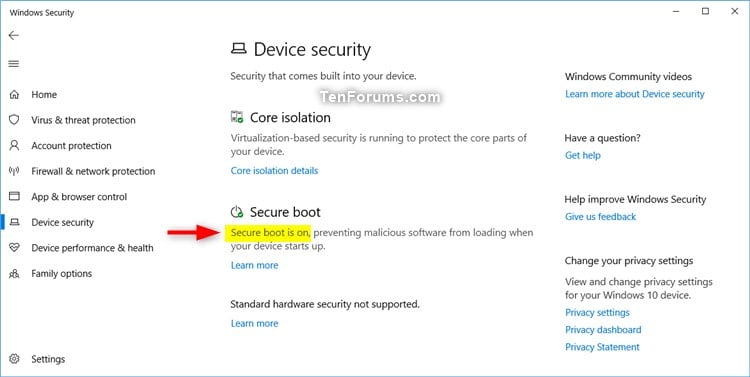
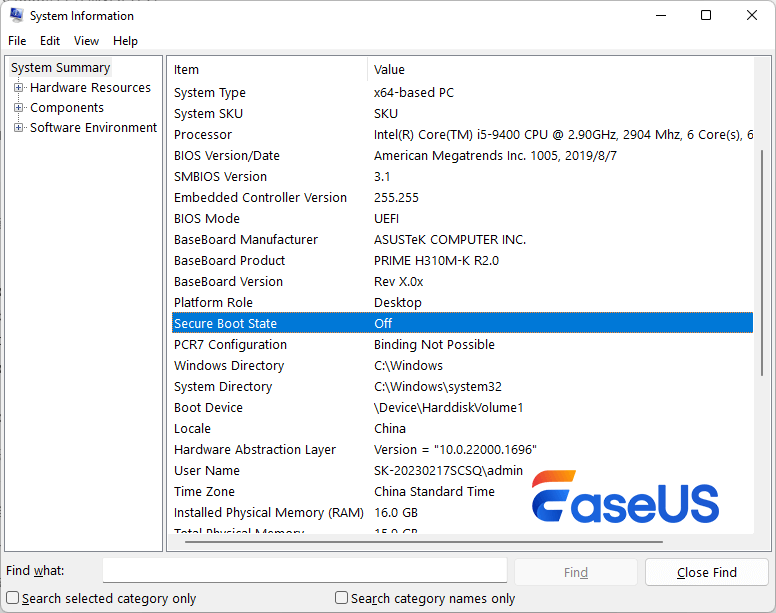
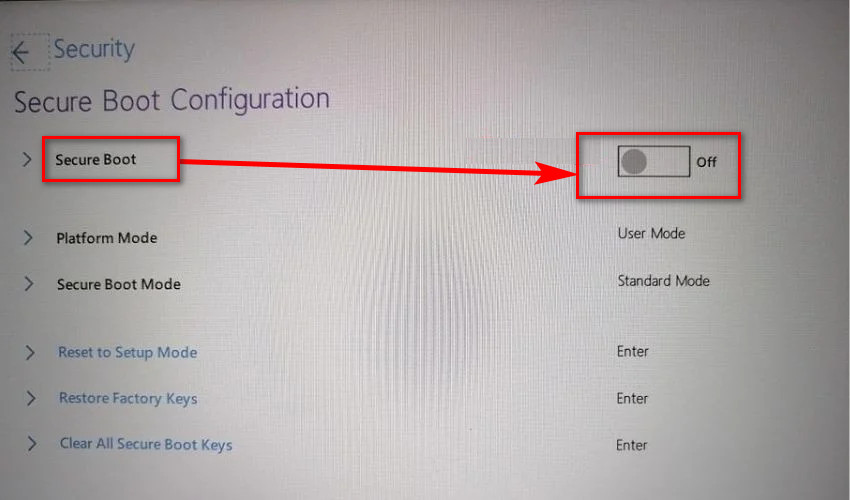
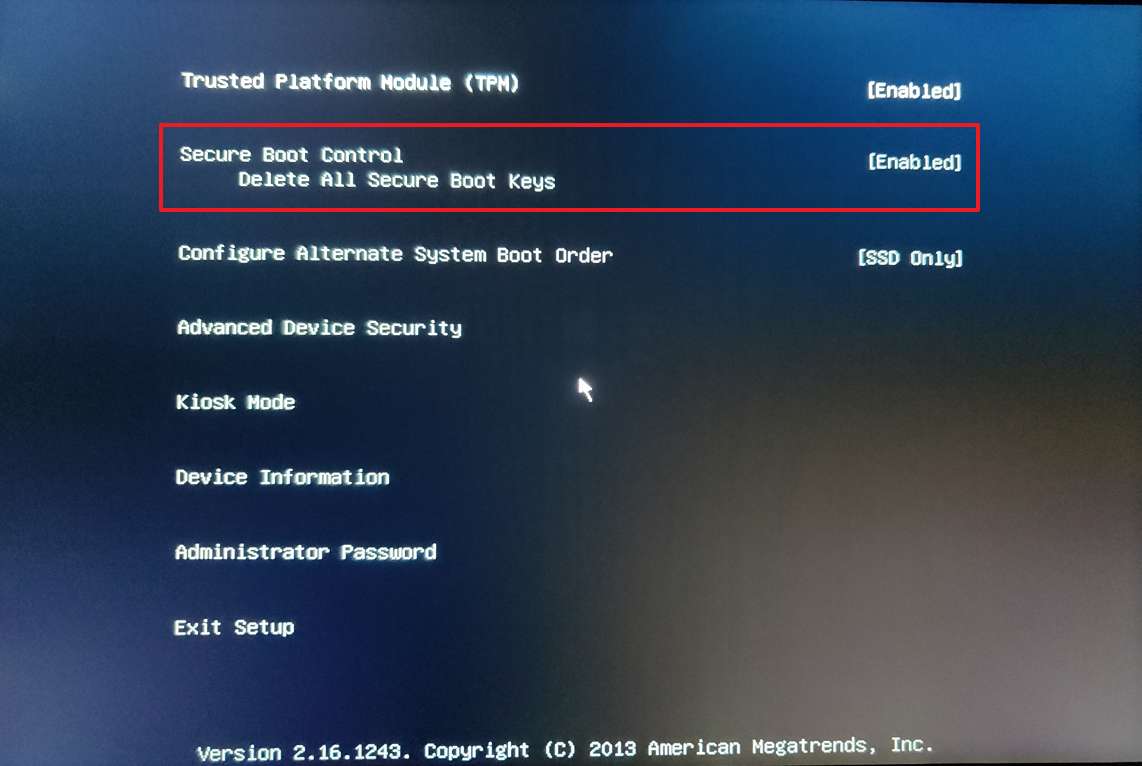
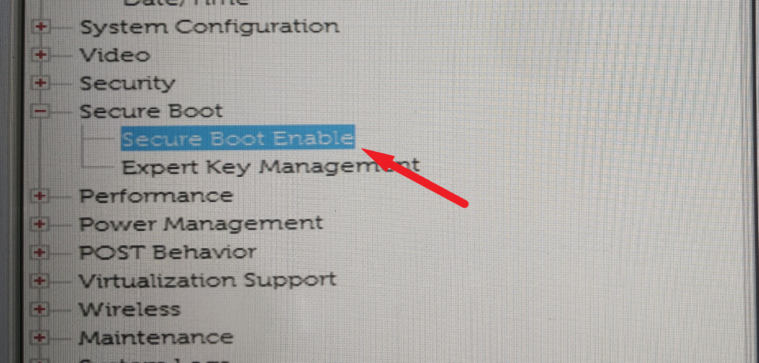
To check if Secure Boot is enabled, you can follow these easy steps: restart your computer, enter the BIOS settings, and look for the Secure Boot option. If it's enabled, you'll see a confirmation message. You can also check your device's user manual or online support pages for specific instructions. For example, on a Windows 10 device, you can press the Windows key + R to open the Run dialog box, type "msinfo32", and then check the BIOS mode section.
Must Read
- What Happens At The End Of Supergirl? A Clear Breakdown Of The Finale
- How Supergirl Sets Up The Dcu Future Without A Post-credits Scene
- Supergirl’s Final Moments Explained: Krem, Krypto, And Kara’s Turning Point
- Supergirl Ending Explained: Kara’s Grief, Ruthye’s Choice, And The Future Of The Dcu
- What Supergirl’s Ending Means For Lobo, Superman, And The Next Dc Films
In conclusion, checking if Secure Boot is enabled is a quick and easy process that can provide an extra layer of protection for your device. By following these simple steps, you can ensure that your device is secure and protected from potential threats, giving you the freedom to enjoy your device without worrying about cyber threats.