How To Enable Secure Boot Windows 10

Are you tired of worrying about your computer's security? Enabling Secure Boot on your Windows 10 device is a great way to add an extra layer of protection against malware and other threats. This useful feature ensures that only trusted software can run on your computer, giving you peace of mind when browsing the internet or using external devices.
The purpose of Secure Boot is to prevent unauthorized software from loading during the boot process. By enabling it, you can significantly reduce the risk of your computer being infected with malware or viruses. This is especially important for users who work with sensitive information or use their devices for online banking and shopping.
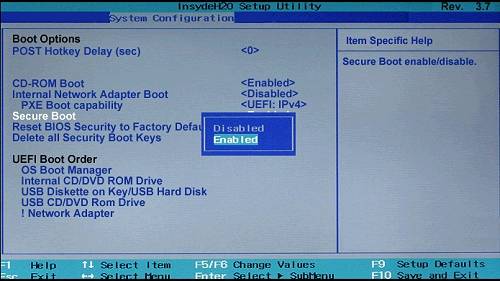
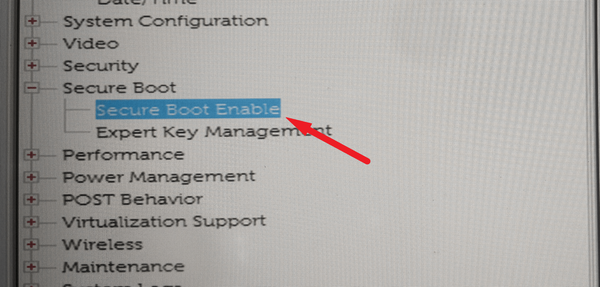
For example, if you're a gamer or a student, you likely use your computer to download and install various software and apps. With Secure Boot enabled, you can be sure that these downloads are safe and won't harm your device. To enable Secure Boot, simply restart your computer, enter the BIOS settings, and look for the Secure Boot option. Follow the prompts to enable it, and you're good to go!
Must Read
- What Happens At The End Of Supergirl? A Clear Breakdown Of The Finale
- How Supergirl Sets Up The Dcu Future Without A Post-credits Scene
- Supergirl’s Final Moments Explained: Krem, Krypto, And Kara’s Turning Point
- Supergirl Ending Explained: Kara’s Grief, Ruthye’s Choice, And The Future Of The Dcu
- What Supergirl’s Ending Means For Lobo, Superman, And The Next Dc Films
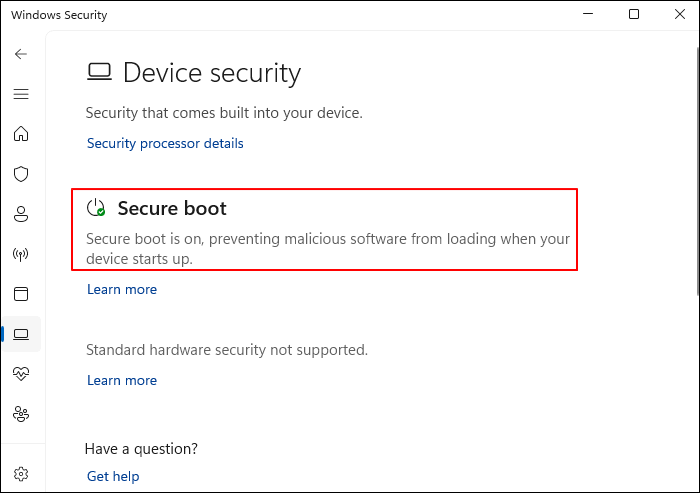
As a practical tip, make sure to save your changes and exit the BIOS settings properly to avoid any issues. By taking this simple step, you can enjoy a more secure computing experience and protect your device from potential threats.


![How to Enable Secure Boot Without BIOS [Complete Guide]](https://10pcg.com/wp-content/uploads/bios-secure-boot-on.jpg)