How To Transpose Data In Excel
Many people enjoy working with data in Excel as it helps them to organize, analyze, and present their information in a clear and concise manner. The ability to transpose data is one of the most useful features in Excel, allowing users to easily switch the rows and columns of a dataset.
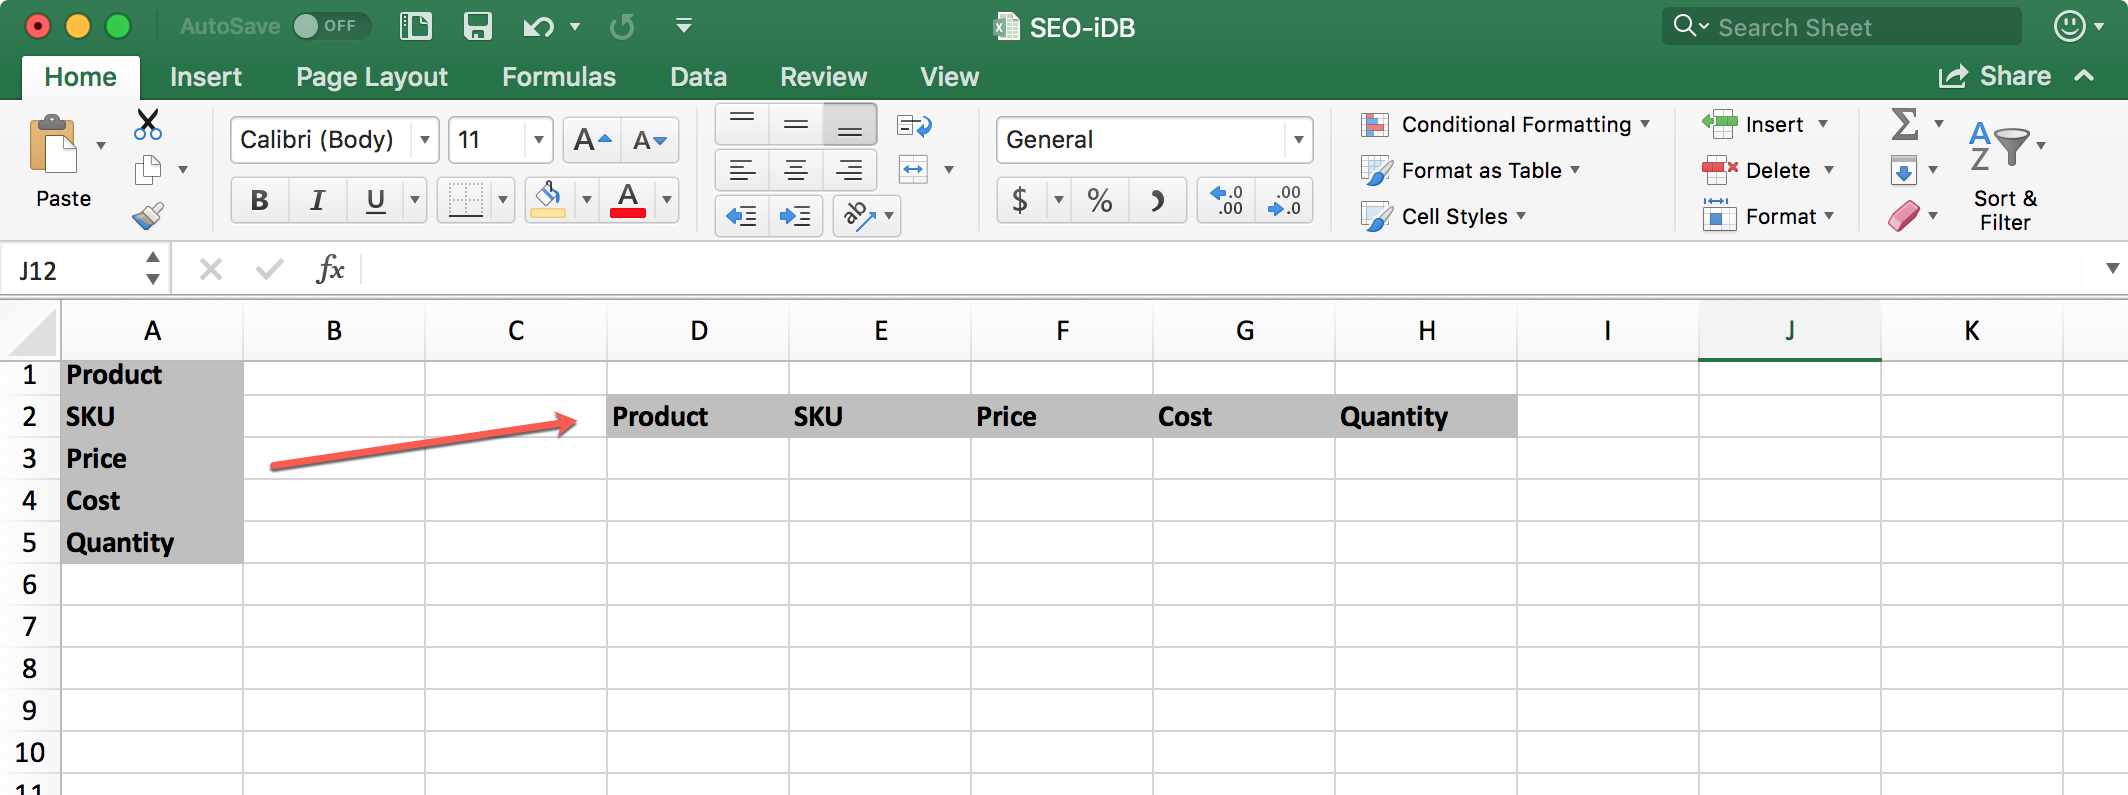
The benefits of transposing data in Excel are numerous, and it serves a significant purpose in everyday life. For instance, it can be used to rotate tables to make them more readable, or to convert data from a vertical format to a horizontal one. Common examples of transposing data include shifting survey responses from rows to columns, or rearranging financial data to make it easier to analyze.
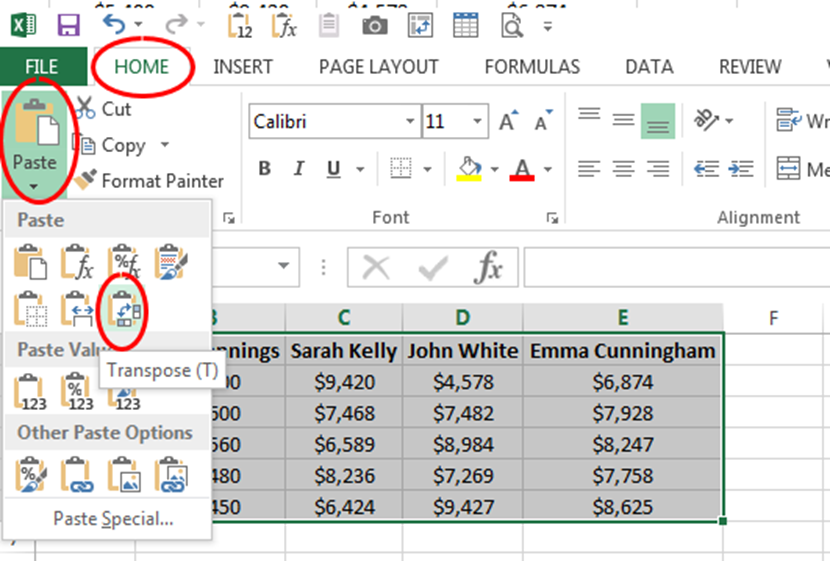
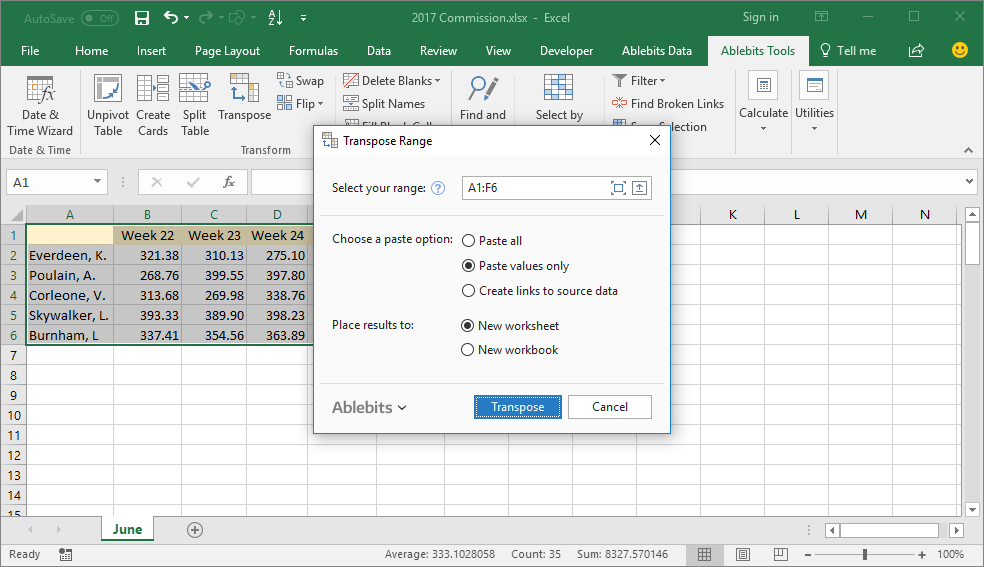
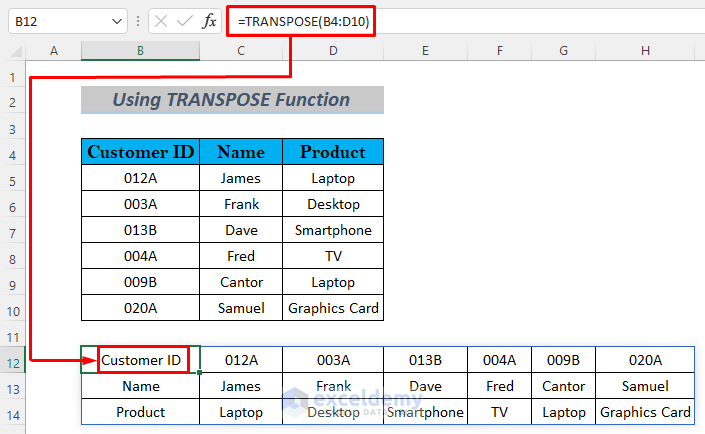
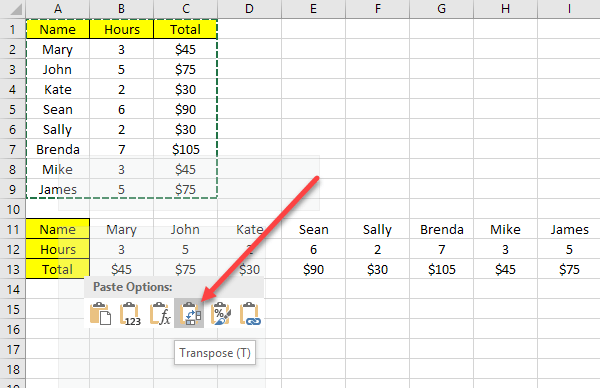
In everyday life, transposing data is applied in various ways, such as data analysis, reporting, and presentations. To transpose data effectively, it's essential to select the entire range of cells that you want to transpose, then go to the paste special option and choose transpose. By doing so, you can easily rearrange your data to suit your needs.
Must Read
- What Happens At The End Of Supergirl? A Clear Breakdown Of The Finale
- How Supergirl Sets Up The Dcu Future Without A Post-credits Scene
- Supergirl’s Final Moments Explained: Krem, Krypto, And Kara’s Turning Point
- Supergirl Ending Explained: Kara’s Grief, Ruthye’s Choice, And The Future Of The Dcu
- What Supergirl’s Ending Means For Lobo, Superman, And The Next Dc Films
To enjoy transposing data more effectively, it's recommended to practice regularly and experiment with different datasets. Additionally, using shortcuts such as ALT + E + S + T can save time and increase productivity. By mastering the art of transposing data in Excel, you can unlock new possibilities for data analysis and presentation, making your work more efficient and effective.