Learn To Draw A Polar Bear Like A Prothese Step By Step Secrets Are Explosive
Hey, have you ever wanted to draw a polar bear that looks like it was drawn by a pro? I mean, who wouldn't, right? It's like the ultimate artistic achievement or something.
So, let's get started with the basics - you're going to need a few simple tools, like a pencil, some paper, and an eraser. Oh, and a lot of patience, because, let's be real, drawing a polar bear is not exactly a walk in the park. But don't worry, I've got your back.
The Basics
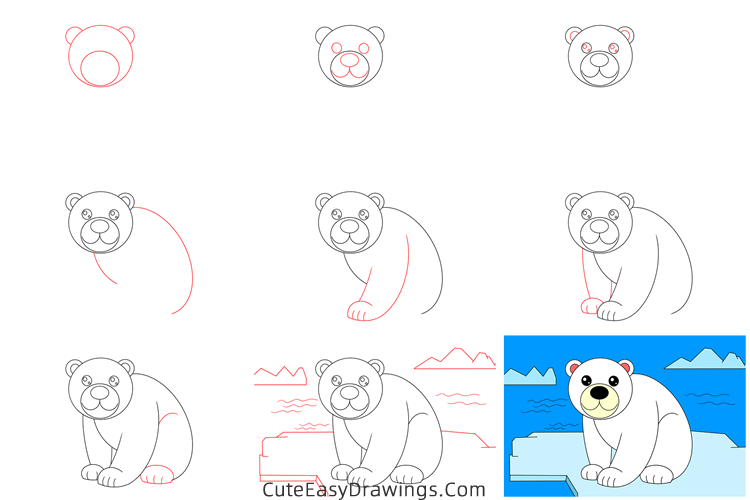
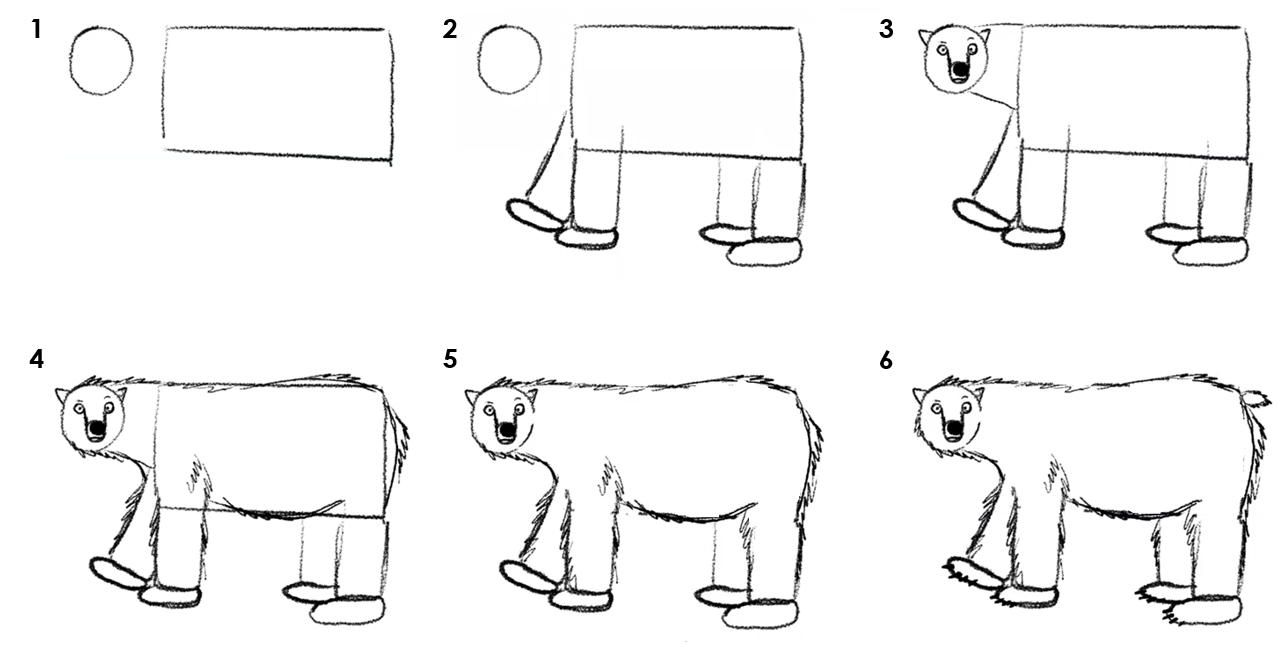
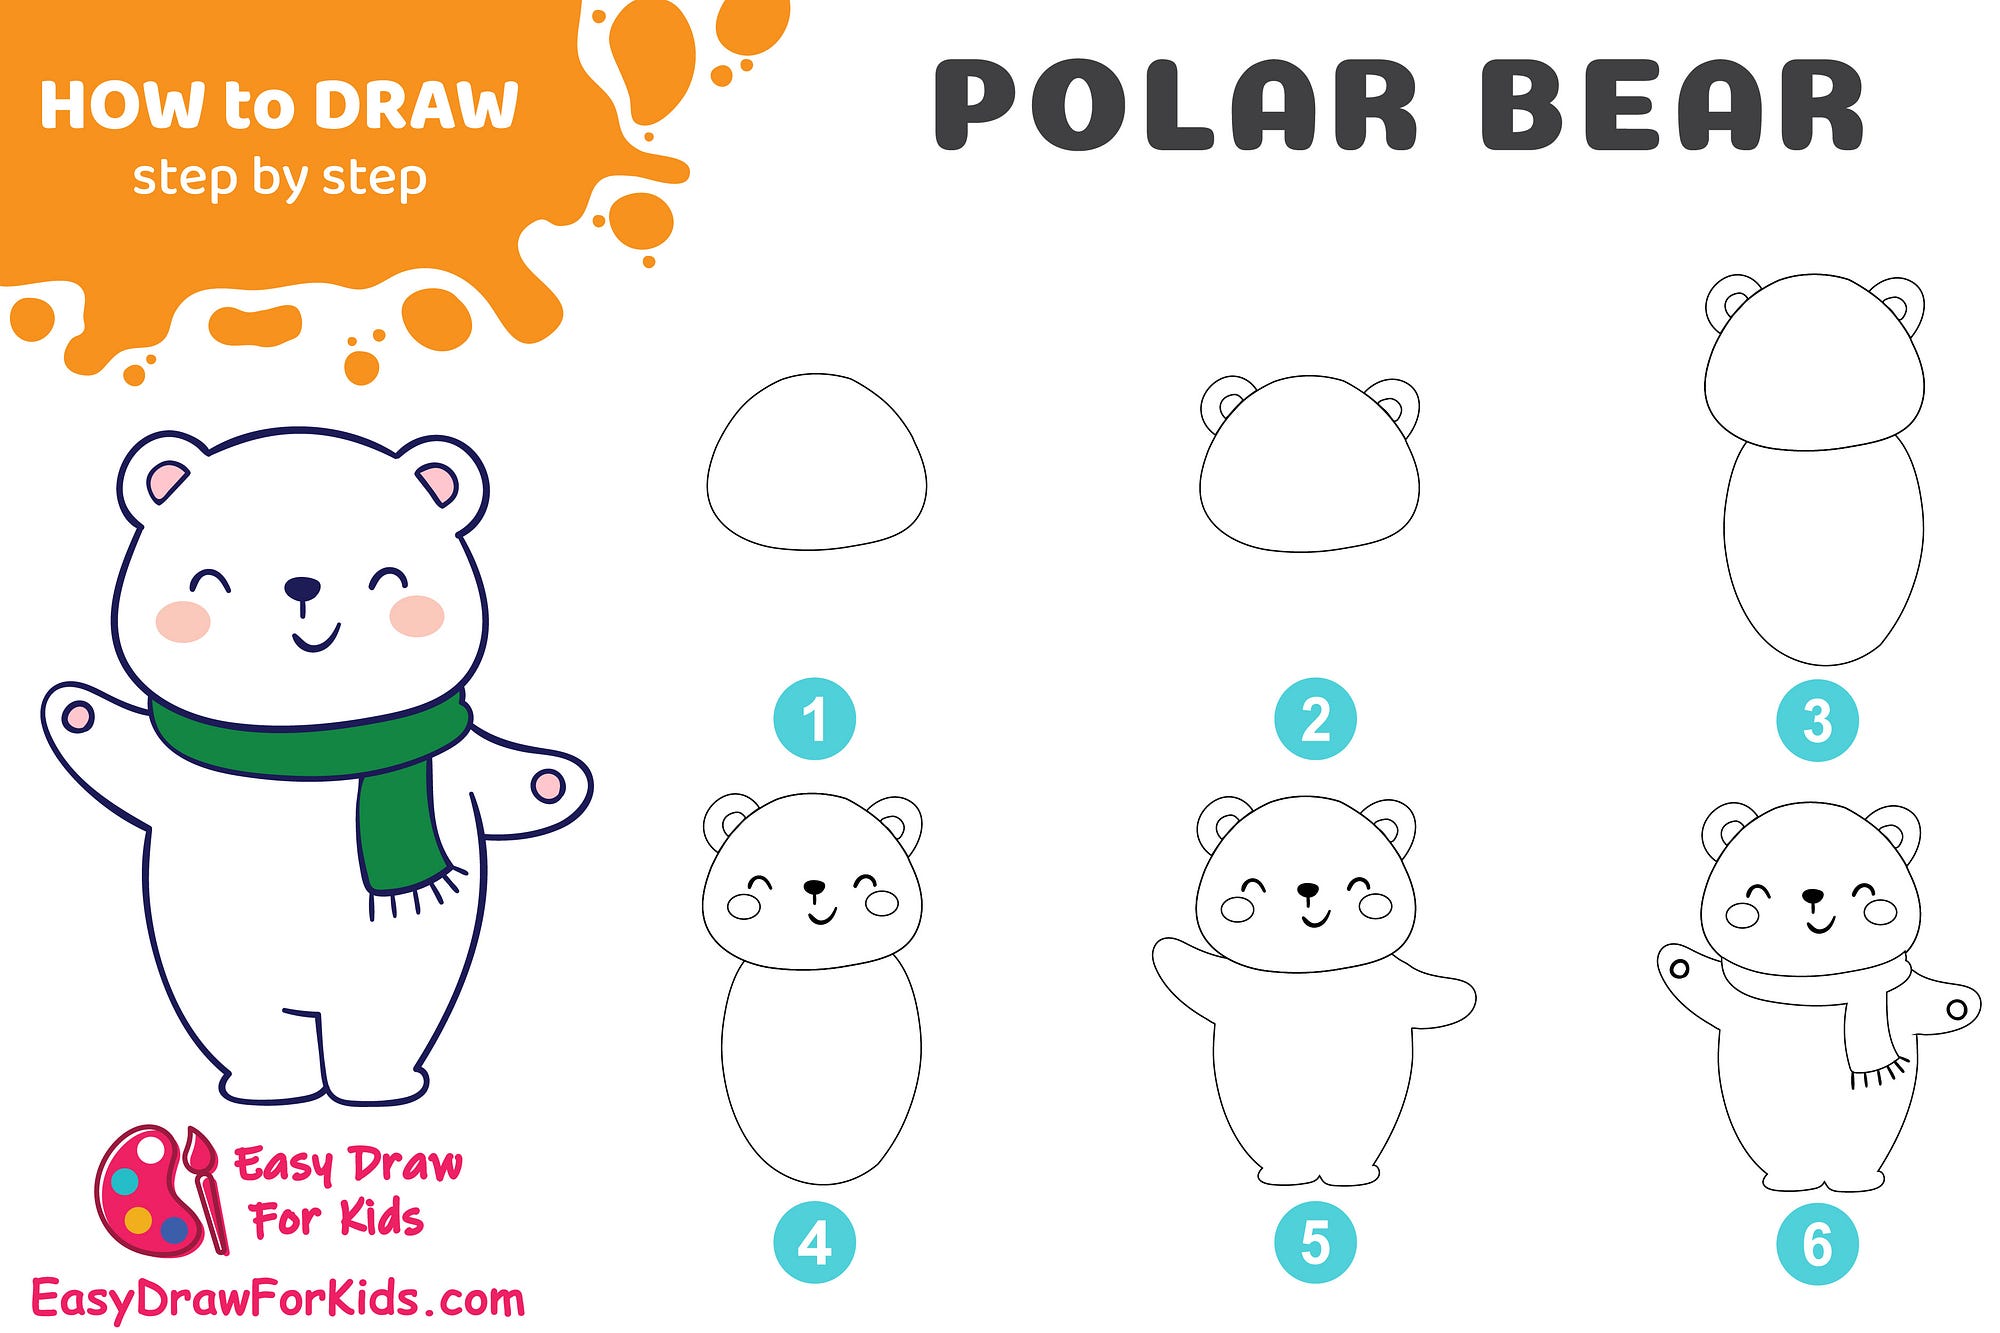
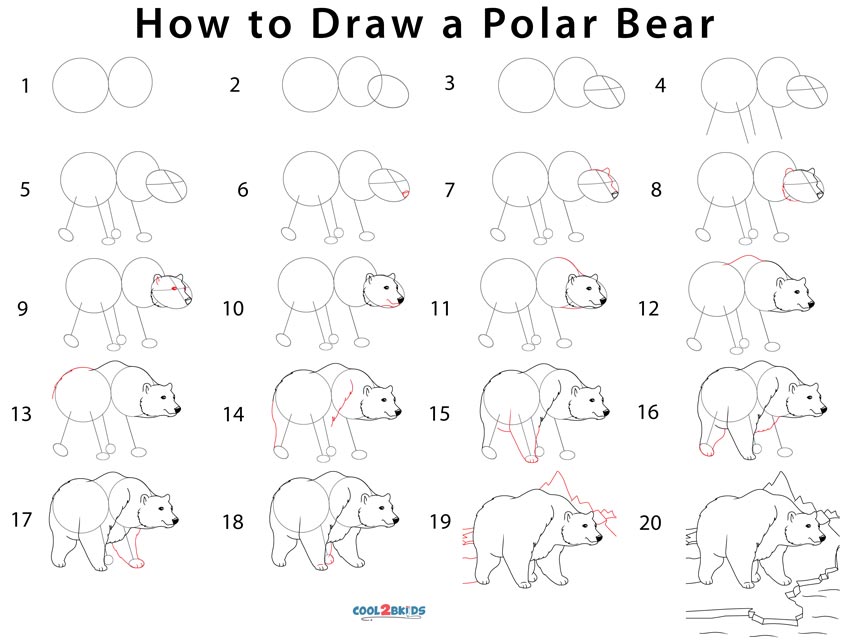
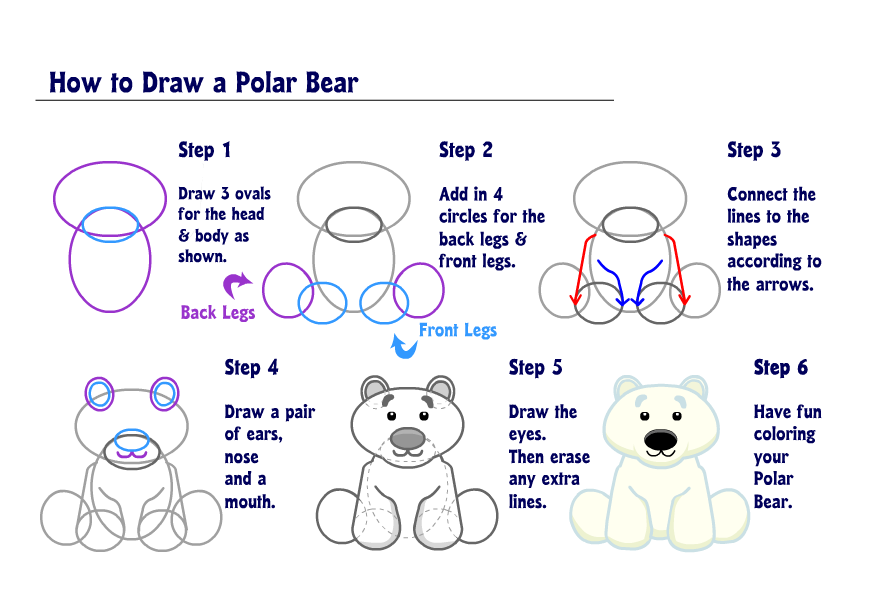
First things first, you need to get the shape right. Think of a polar bear as a big, fluffy oval with a smaller oval for the head. Sounds simple, but trust me, it's all about the proportions.
Must Read
Once you've got your ovals, it's time to add some details - like eyes, a nose, and a mouth. And let me tell you, this is where things can get a little tricky. But don't worry, just take your time and remember, it's all about the little things.
The Fur
Now, this is where things get really interesting - the fur. I mean, have you ever tried to draw fluffy fur before? It's like trying to draw a thousand tiny lines all at once. But the key is to just relax and go with it - don't overthink it.
So, to draw the fur, you're going to want to use short, curvy lines that follow the shape of the body. And don't forget to add some texture - like, you know, to make it look all fluffy and stuff.

And there you have it - a polar bear that looks like it was drawn by a pro. Well, maybe not a pro, but at least it looks pretty good, right? The secret to drawing a great polar bear is to just have fun with it and not get too stressed out about the details.
So, go ahead, give it a try - I dare you. And don't worry if it doesn't turn out exactly as you imagined - after all, it's all about the journey, not the destination. Happy drawing, and don't forget to show me your masterpiece when you're done.