Remove Device From Microsoft Account
Managing your Microsoft Account has never been more important, especially with the amount of devices we use on a daily basis. One useful feature that many people overlook is the ability to remove devices from their Microsoft Account. This topic may not seem exciting at first, but trust us, it's a game-changer when it comes to keeping your account secure and organized.
The purpose of removing devices from your Microsoft Account is to prevent unauthorized access and keep your account private. By doing so, you can ensure that only authorized devices have access to your account, reducing the risk of hacking and identity theft. For example, if you've sold or given away an old device, you'll want to remove it from your account to prevent the new owner from accessing your personal info.
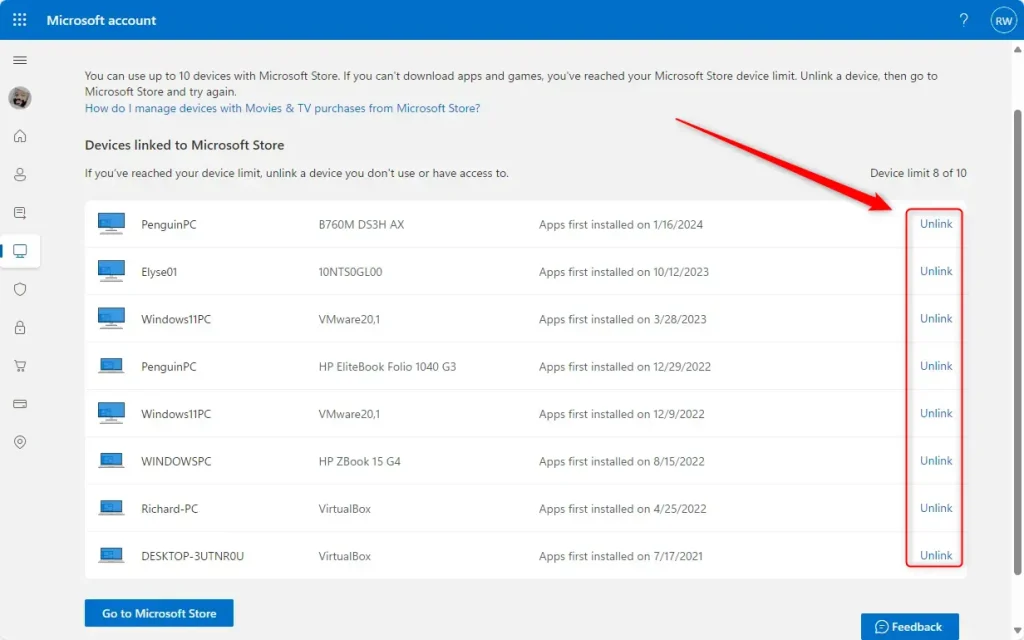
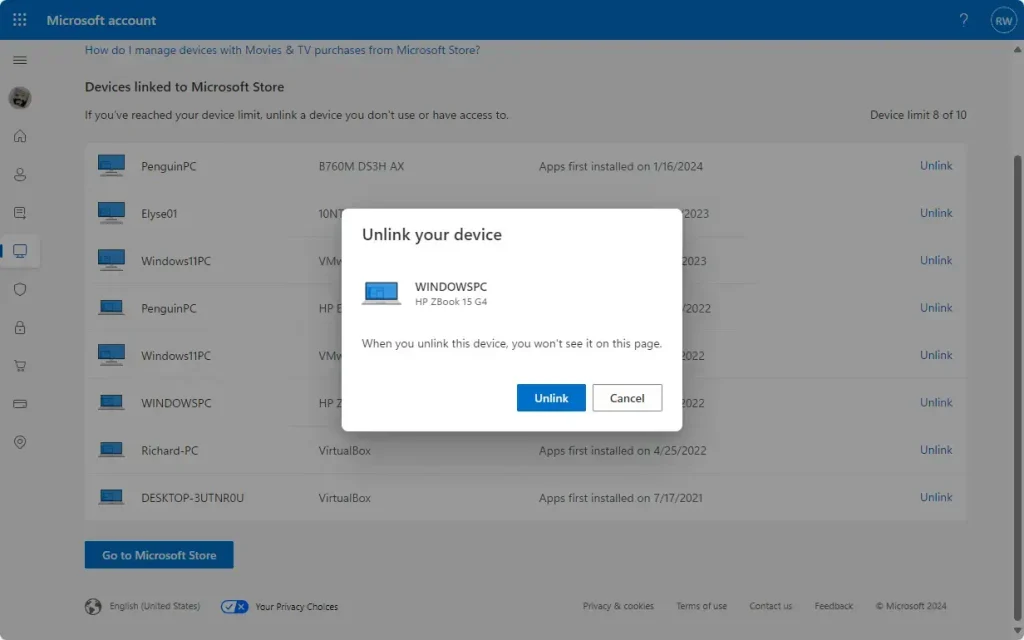
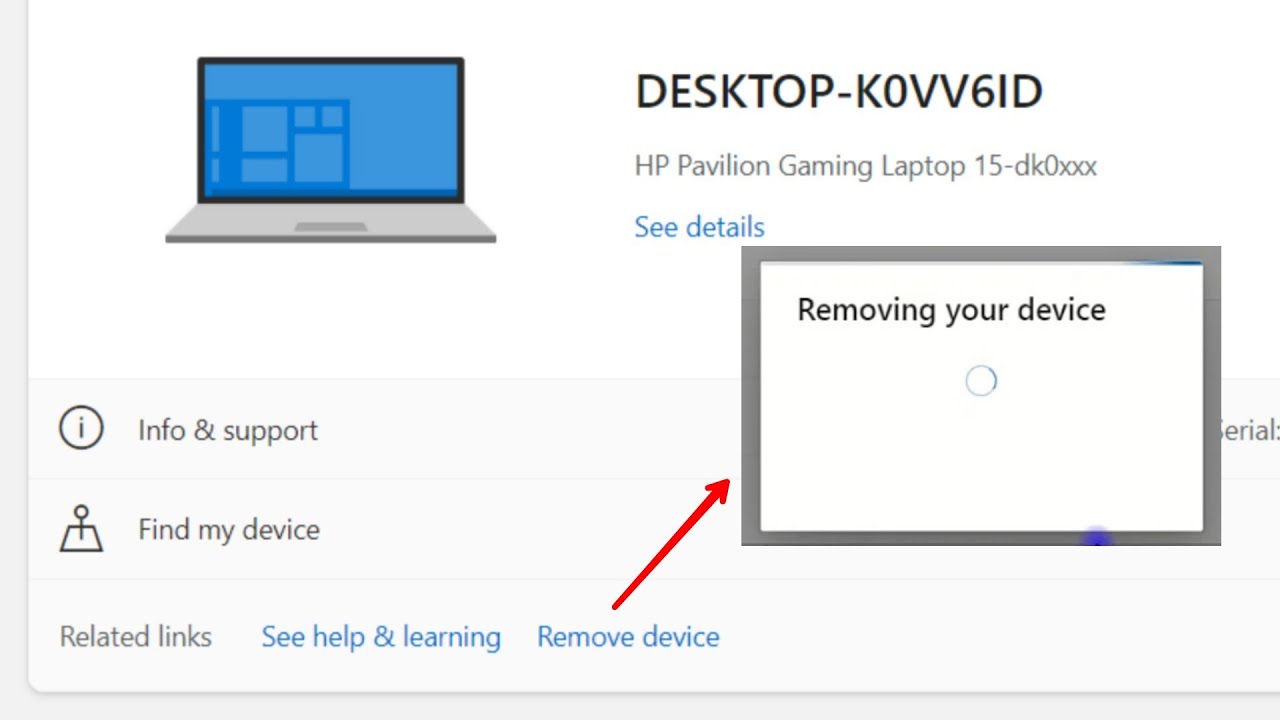
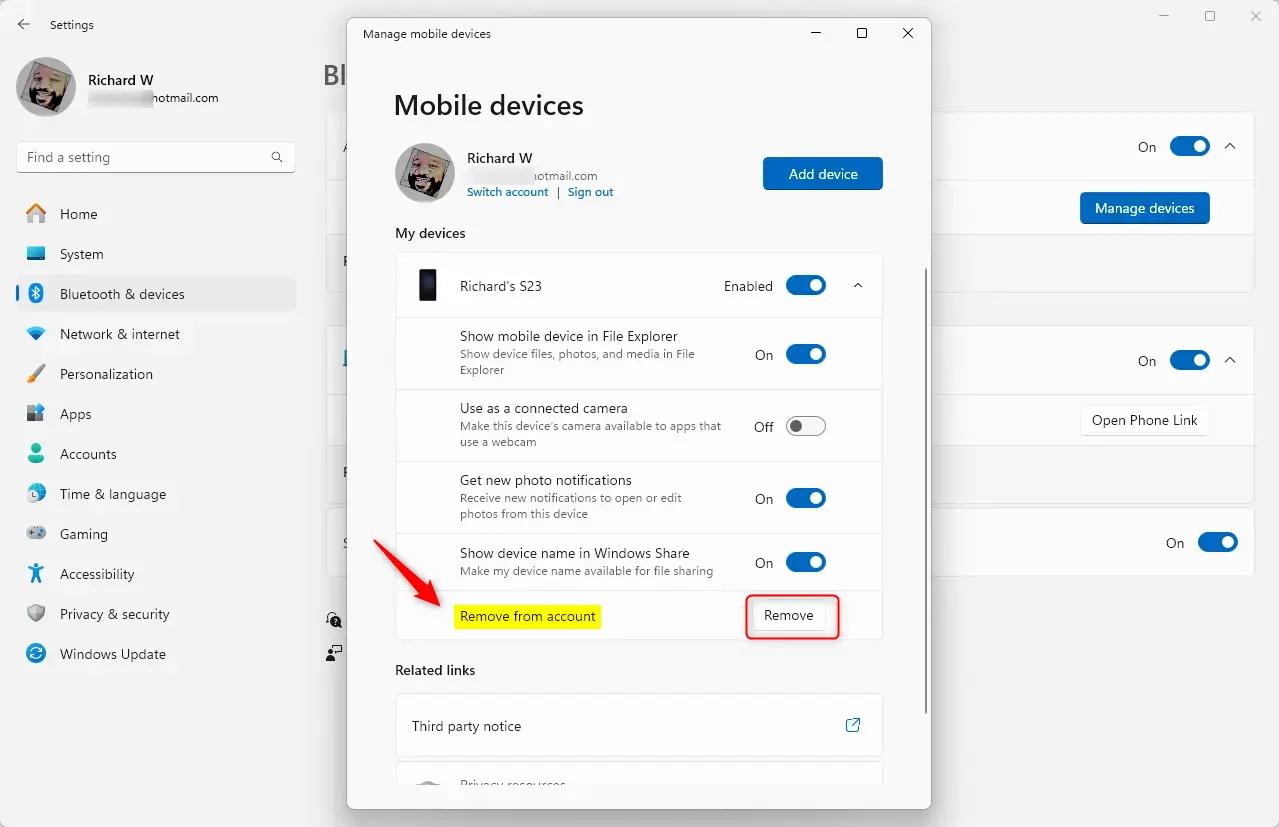
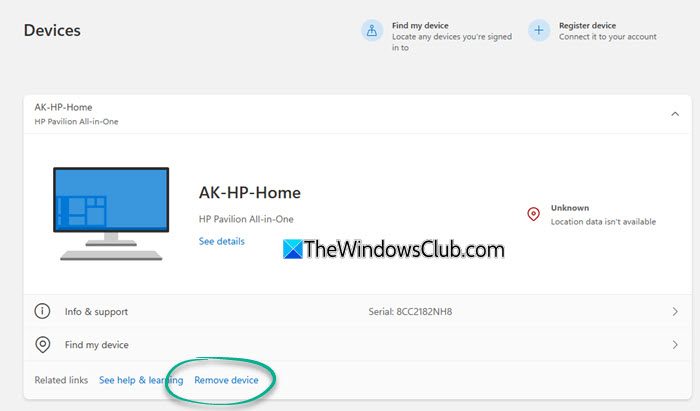
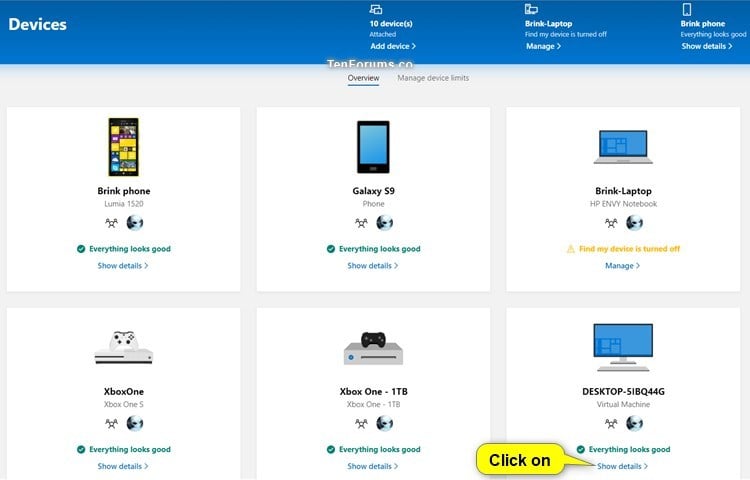
So, how do you do it? It's simple! Just sign in to your Microsoft Account, go to the Devices section, and click on the device you want to remove. Then, follow the prompts to confirm the removal. Some practical tips to keep in mind: make sure to remove devices that are no longer in use, and consider removing devices that are shared with others to keep your account secure. By following these tips, you'll be able to keep your Microsoft Account organized and protected in no time!
Must Read
- What Happens At The End Of Supergirl? A Clear Breakdown Of The Finale
- How Supergirl Sets Up The Dcu Future Without A Post-credits Scene
- Supergirl’s Final Moments Explained: Krem, Krypto, And Kara’s Turning Point
- Supergirl Ending Explained: Kara’s Grief, Ruthye’s Choice, And The Future Of The Dcu
- What Supergirl’s Ending Means For Lobo, Superman, And The Next Dc Films

![How To Remove Any Device From Microsoft Account [Tutorial] - YouTube](https://i.ytimg.com/vi/kE1DvwcMf84/maxresdefault.jpg)