Step By Step Easy Rose Drawing That Anyone Can Master Now

Hey there, friend! So, you want to learn how to draw a rose? Well, you've come to the right place! I'm about to break it down for you in a super simple way, so don't worry if you think you can't draw - I've got your back!
Getting Started
First things first, let's talk about the basics. You'll need a piece of paper and a pencil - that's it! Don't worry about having fancy art supplies, we're keeping it low-key and easy peasy.
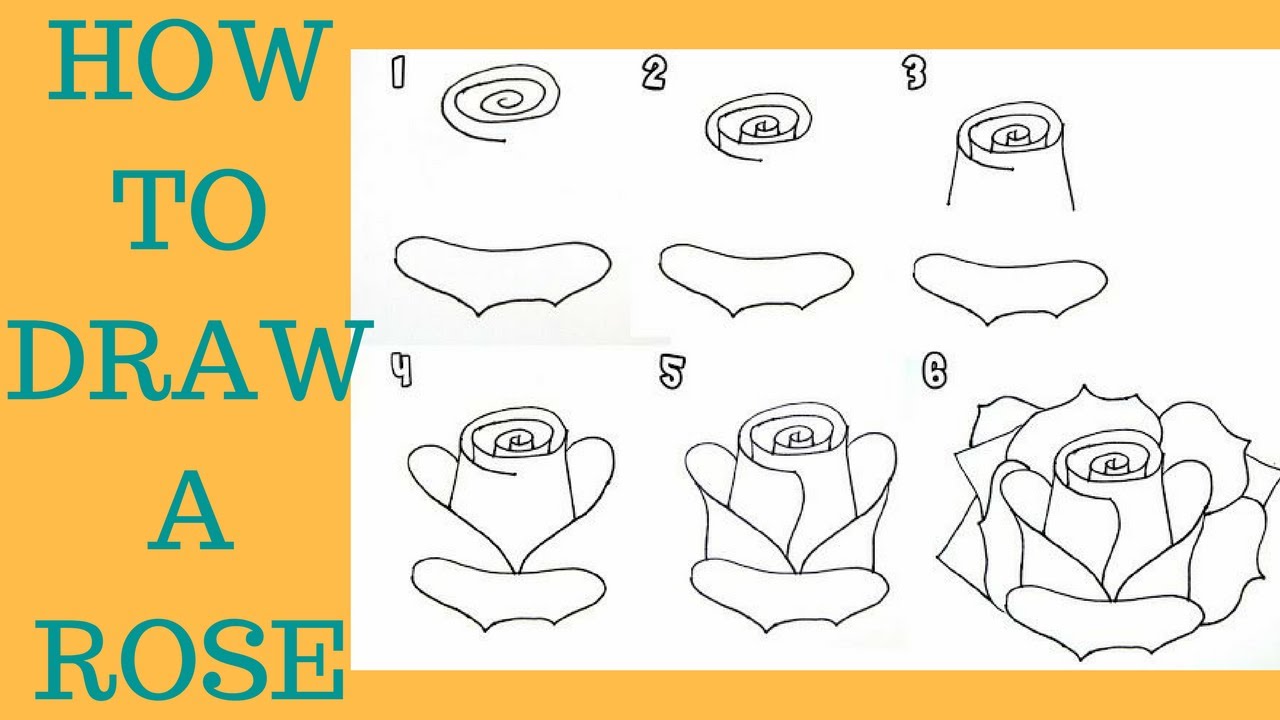
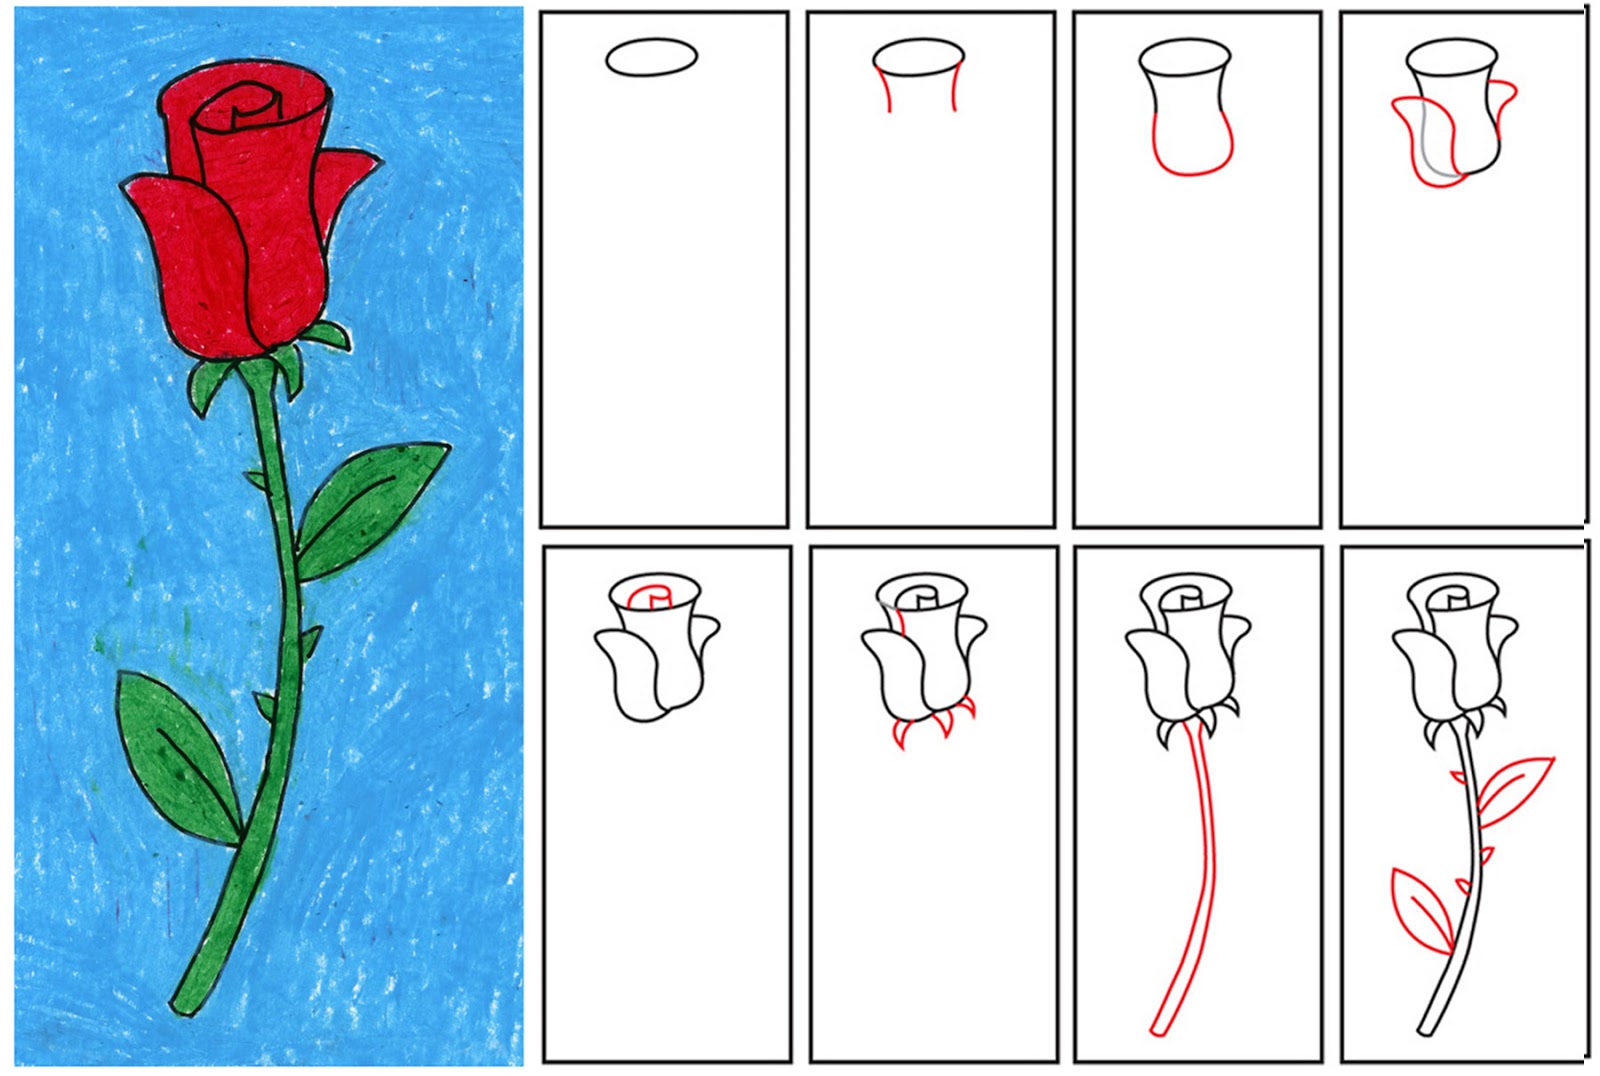
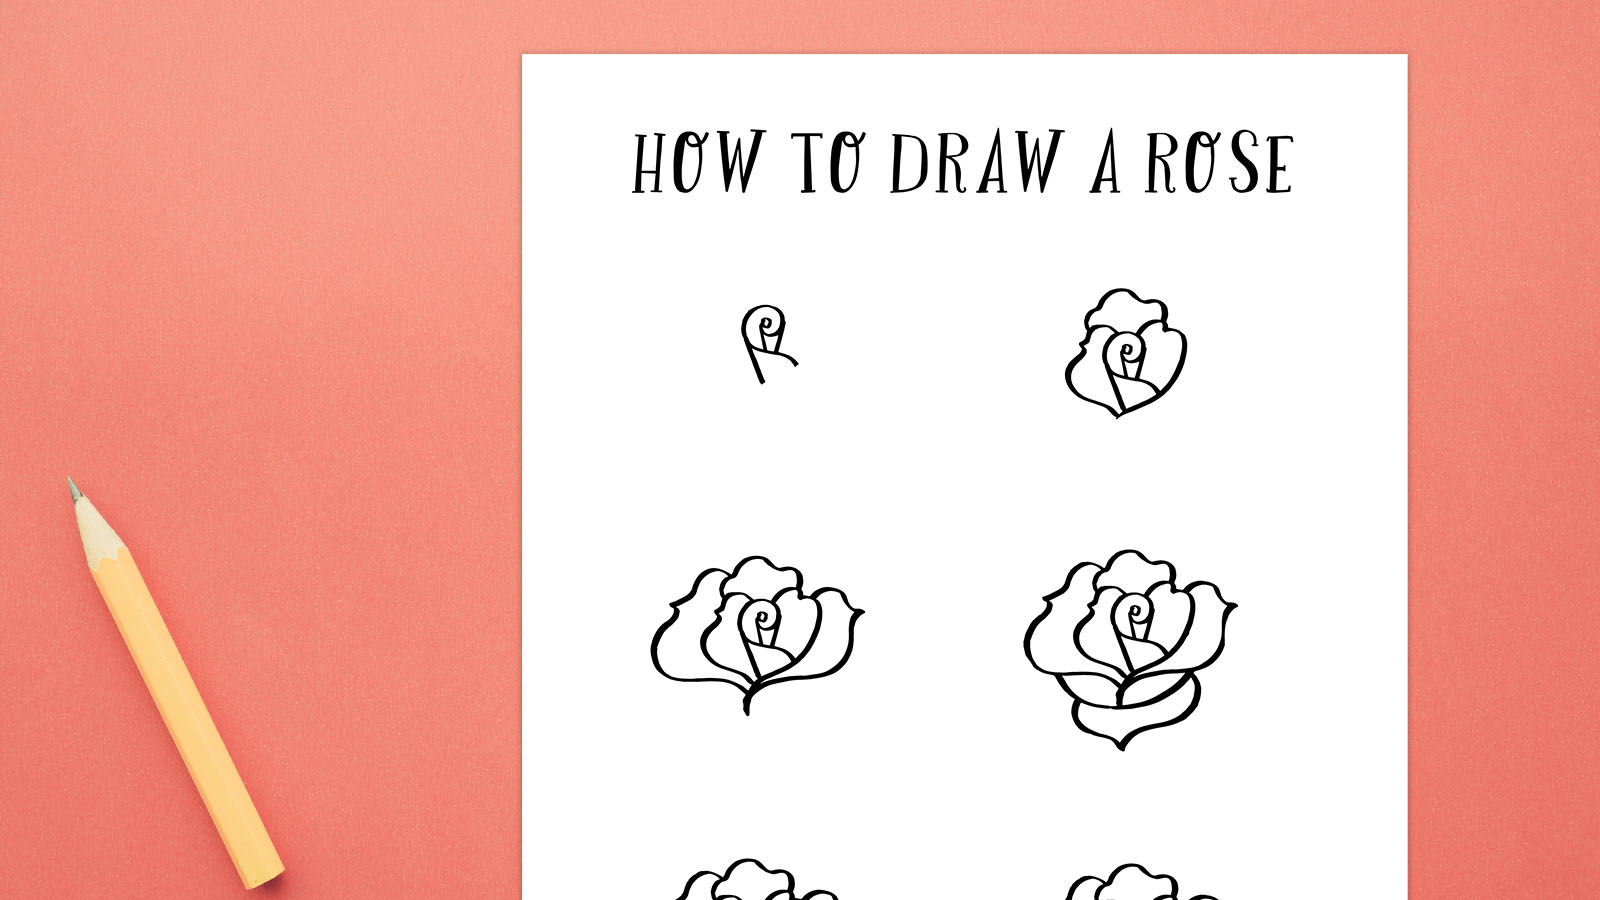
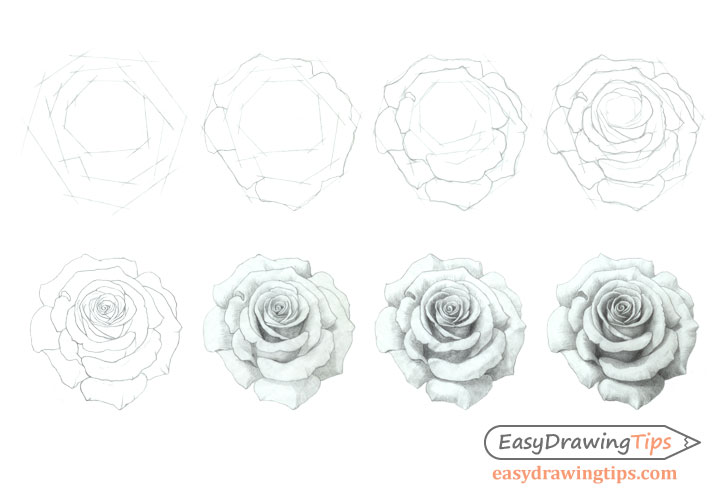
Now, let's get started with the center of the rose. Draw a tiny circle - yep, just a tiny one! This will be the middle of your rose, so make sure it's nice and small.
Must Read
The Petals
Next up, we've got the petals! These are the fun part, and where you can get creative. Draw a teardrop shape around the center circle, and make sure it's nice and smooth. Don't worry if it's not perfect - we're going for rustic charm here!

Keep drawing those teardrop shapes around the center, making sure to leave a little space between each one. You'll start to see your rose come to life - it's like magic!
Adding Some Finishing Touches
Now that you've got your petals down, it's time to add some finishing touches. Draw a few lines in the center of the rose to give it some texture, and you can even add a few leaves if you're feeling fancy!

The best part? You don't have to be a perfect artist to draw a beautiful rose. It's all about having fun and experimenting with different shapes and lines.
In conclusion, drawing a rose is easier than you think! With these simple steps, you can create a beautiful rose that'll make you smile. So go ahead, give it a try, and remember - practice makes perfect, but it's also okay to make mistakes. Happy drawing, friend!