Unlock Secrets To Perfectly Wrap Text In Excelno More Text Overflow
Learning to perfectly wrap text in Excel is a fun and useful skill that can save you time and frustration. Whether you're a beginner or an experienced user, being able to format your text with ease can make a big difference in your productivity. For families and hobbyists, it can also be a great way to create attractive and organized spreadsheets for personal projects.
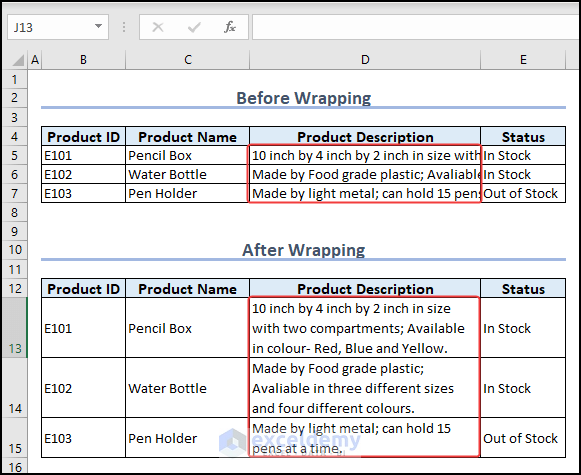
The purpose of wrapping text in Excel is to prevent text overflow and make your data easier to read. By doing so, you can avoid having to manually adjust column widths or deal with cluttered cells. For example, if you're creating a budget or a to-do list, wrapping text can help you keep your information organized and easy to understand.
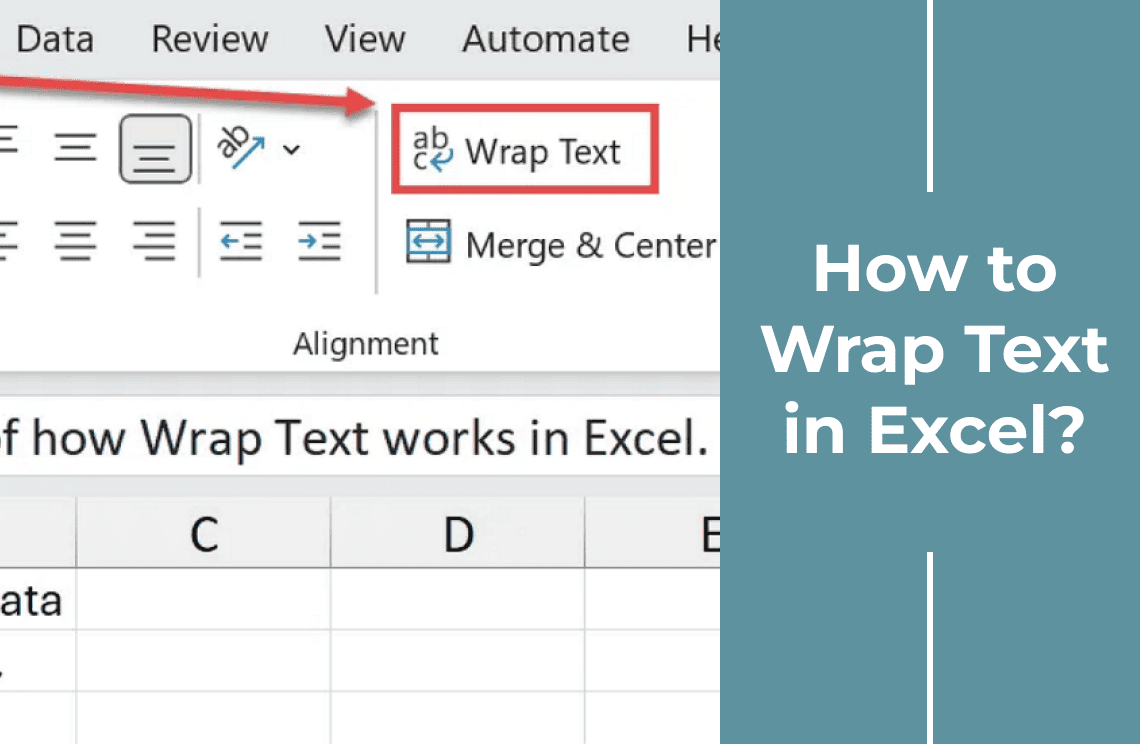
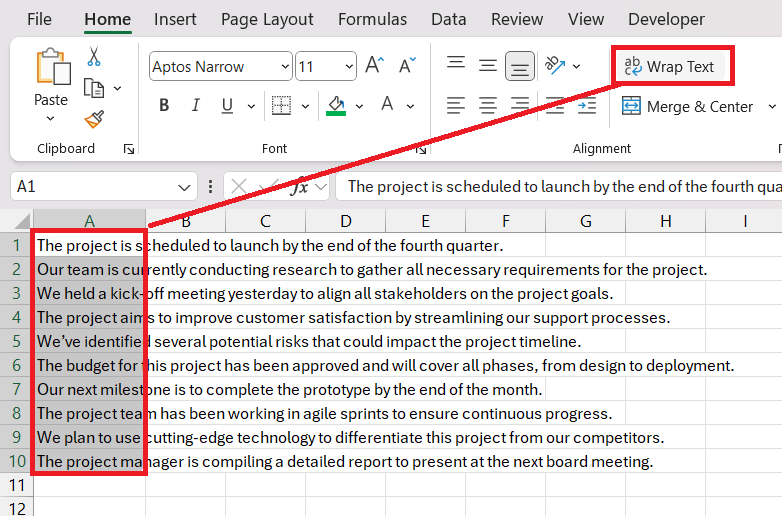
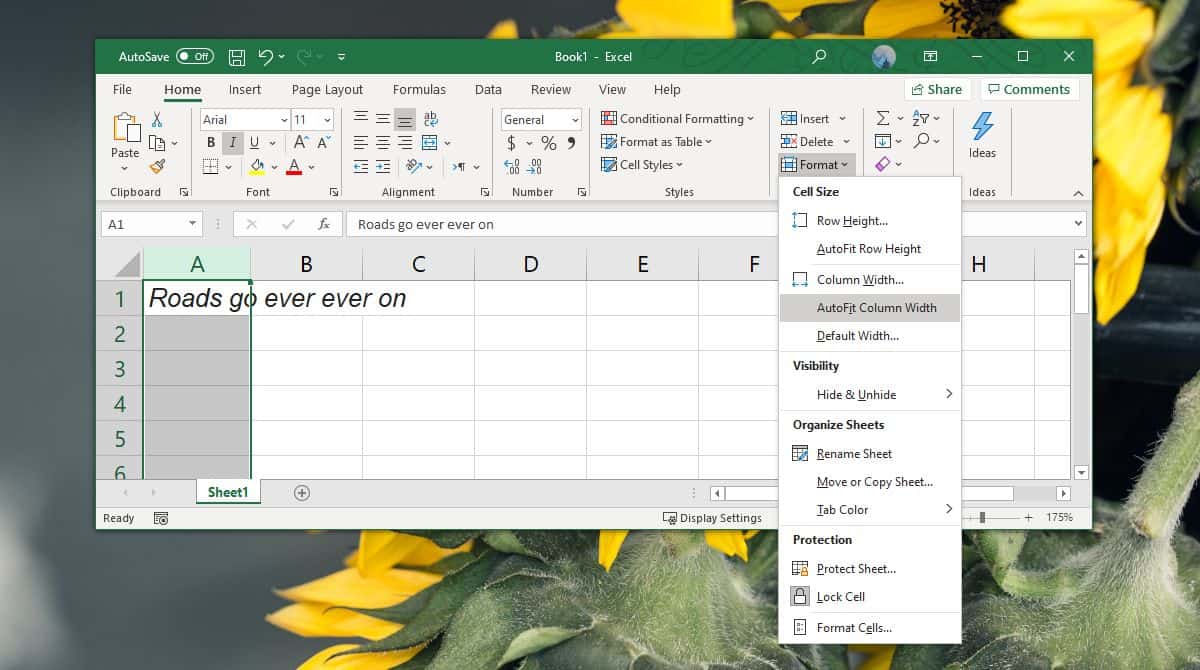
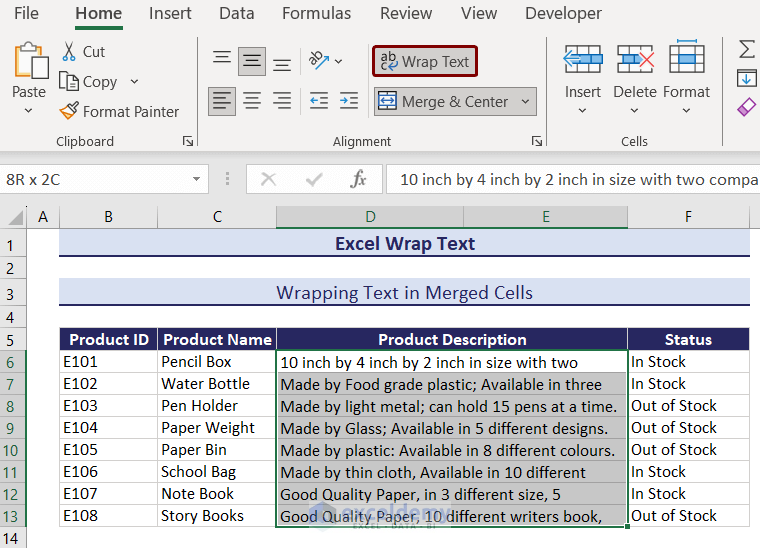
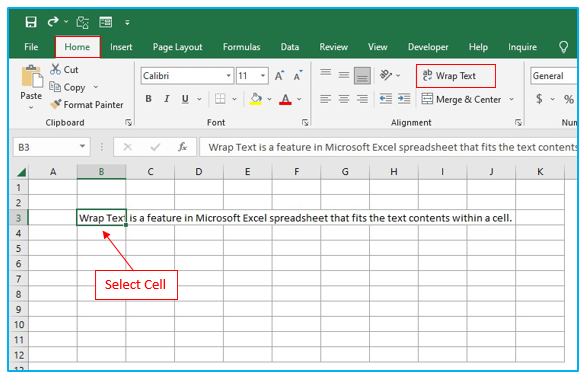
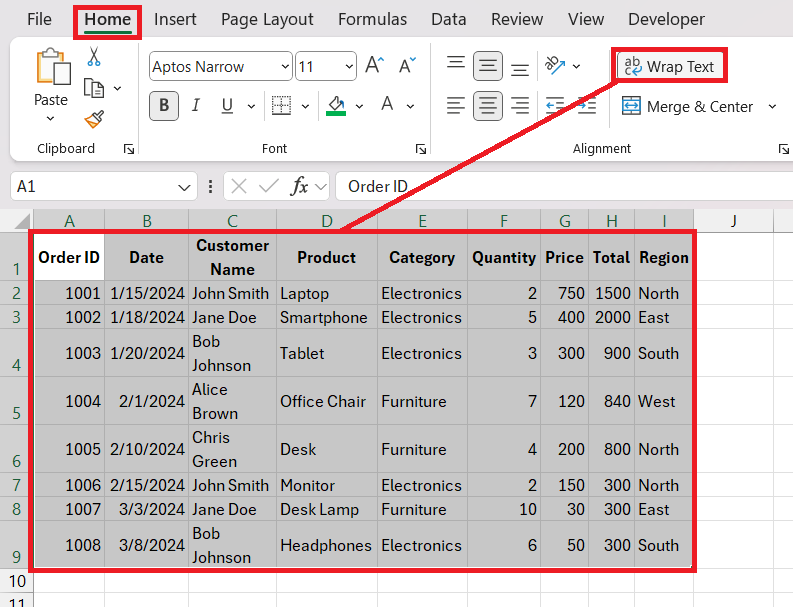
To get started, try using the Wrap Text feature in Excel. Simply select the cell you want to format, go to the Home tab, and click on Wrap Text. You can also use shortcuts like Alt + H + W to quickly wrap text. For more advanced users, you can experiment with different font styles and colors to make your text stand out.
Must Read
- What Happens At The End Of Supergirl? A Clear Breakdown Of The Finale
- How Supergirl Sets Up The Dcu Future Without A Post-credits Scene
- Supergirl’s Final Moments Explained: Krem, Krypto, And Kara’s Turning Point
- Supergirl Ending Explained: Kara’s Grief, Ruthye’s Choice, And The Future Of The Dcu
- What Supergirl’s Ending Means For Lobo, Superman, And The Next Dc Films
In conclusion, learning to perfectly wrap text in Excel is a valuable skill that can make a big difference in your daily life. With these simple tips, you can create professional-looking spreadsheets and improve your productivity. So why not give it a try and discover the joy of perfectly wrapped text?

![[Fix] Wrap Text Not Working in Excel: 4 Possible Solutions - ExcelDemy](https://www.exceldemy.com/wp-content/uploads/2022/02/Wrap-Text-Not-Working-in-Excel-1-6-767x384.png)